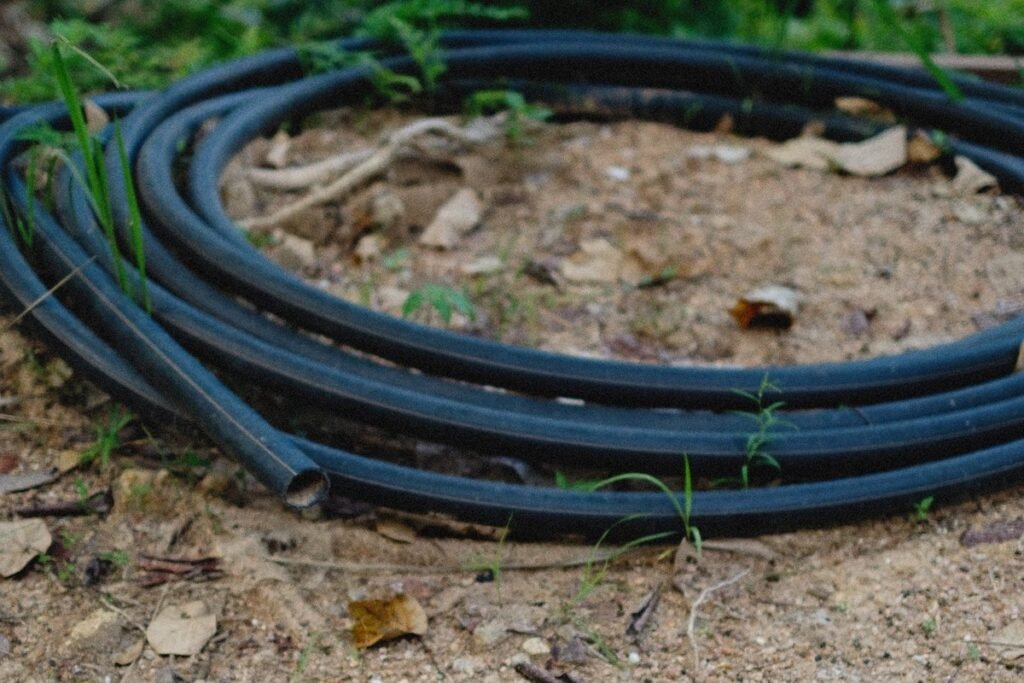
Drip tubing length for a garden layout is the total length of drip line along all rows, plus the header that feeds those rows, plus spare for cuts and joins. For six 10 m rows with one line each, row tubing is 60 m, and the planner page gives about 66 m of tubing plus 10% spare.
Start with the rows, because they give most of the total. Count the rows, count the lines along each row, and measure one row.
Drip tubing length and the row tubing formula
The planner formula is tubing equals rows times lines times row length plus header. Take the number of rows, multiply by the number of drip lines along each row, multiply by the length of one row, and then add the header length.
Use the same unit all the way through. If rows are in metres, the answer is in metres. If rows are in feet, the answer is in feet. Do not mix metres and feet in one sum.
Lines per row change the total fast. One line along each row gives one length of tubing per row. Two lines give two lengths per row, so row tubing doubles. Check the lines number before you buy. Measure row length with a tape.
The worked example: six 10 m rows
The planner page gives a worked example. Six 10 m rows with one line each, 30 cm emitter spacing and 2 L/h emitters need 198 emitters, 396 L/h of flow, one zone on a 1,000 L/h supply, and about 66 m of tubing plus 10% spare. Row tubing is 6 times 1 times 10, which is 60 m.
Quote that figure as the page words it. The page says about 66 m of tubing plus 10% spare. Do not try to split 66 m into an exact row part and an exact header part, because the page does not state a header length. Any header length written here would be invented.
The planner page gives about 66 m of tubing plus 10% spare for six 10 m rows. It states no header length, so this guide does not split 66 m into row tubing, header and spare parts. Row tubing is 60 m on its own. Measure your own header and add it, then add spare. Use the drip irrigation planner to work your own rows through the same formula.
The imperial example on the page is a separate example. Six 30 ft rows at 12 in spacing need 180 emitters and 90 gph. The page does not give a tubing total for that imperial example.
Drip tubing length tables in metres
The table below gives row tubing totals for named layouts. Rows are 4, 6, 8 and 10. Row lengths are 5, 10, 15 and 20 m. Each total with spare is row tubing multiplied by 1.10, which is row tubing plus 10% spare. The table does not include the header, and its 66 m is a table figure, not the page figure.
| Rows | Row length m | One line row tubing m | One line with 10 percent spare m | Two lines row tubing m | Two lines with 10 percent spare m |
|---|---|---|---|---|---|
| 4 | 5 | 20 | 22 | 40 | 44 |
| 4 | 10 | 40 | 44 | 80 | 88 |
| 4 | 15 | 60 | 66 | 120 | 132 |
| 4 | 20 | 80 | 88 | 160 | 176 |
| 6 | 5 | 30 | 33 | 60 | 66 |
| 6 | 10 | 60 | 66 | 120 | 132 |
| 6 | 15 | 90 | 99 | 180 | 198 |
| 6 | 20 | 120 | 132 | 240 | 264 |
| 8 | 5 | 40 | 44 | 80 | 88 |
| 8 | 10 | 80 | 88 | 160 | 176 |
| 8 | 15 | 120 | 132 | 240 | 264 |
| 8 | 20 | 160 | 176 | 320 | 352 |
| 10 | 5 | 50 | 55 | 100 | 110 |
| 10 | 10 | 100 | 110 | 200 | 220 |
| 10 | 15 | 150 | 165 | 300 | 330 |
| 10 | 20 | 200 | 220 | 400 | 440 |
Read the table by finding your row count and your row length, then read across to the lines column that matches your plan. For six 10 m rows with one line each, the table gives 60 m and 66 m with 10% spare. With two lines each, it gives 120 m and 132 m.
Use the table as a check, not as a replacement for measuring. If your rows are not all the same length, work each group separately and add the groups together. The spare in the table is 10% of row tubing only.
Drip tubing length tables in feet
The table below is the imperial version of the same maths. Rows are 4, 6, 8 and 10. Row lengths are 15, 30, 45 and 60 ft. Each total with spare is row tubing multiplied by 1.10. The table does not include the header.
| Rows | Row length ft | One line row tubing ft | One line with 10 percent spare ft | Two lines row tubing ft | Two lines with 10 percent spare ft |
|---|---|---|---|---|---|
| 4 | 15 | 60 | 66 | 120 | 132 |
| 4 | 30 | 120 | 132 | 240 | 264 |
| 4 | 45 | 180 | 198 | 360 | 396 |
| 4 | 60 | 240 | 264 | 480 | 528 |
| 6 | 15 | 90 | 99 | 180 | 198 |
| 6 | 30 | 180 | 198 | 360 | 396 |
| 6 | 45 | 270 | 297 | 540 | 594 |
| 6 | 60 | 360 | 396 | 720 | 792 |
| 8 | 15 | 120 | 132 | 240 | 264 |
| 8 | 30 | 240 | 264 | 480 | 528 |
| 8 | 45 | 360 | 396 | 720 | 792 |
| 8 | 60 | 480 | 528 | 960 | 1056 |
| 10 | 15 | 150 | 165 | 300 | 330 |
| 10 | 30 | 300 | 330 | 600 | 660 |
| 10 | 45 | 450 | 495 | 900 | 990 |
| 10 | 60 | 600 | 660 | 1200 | 1320 |
For six 30 ft rows with one line each, the table gives 180 ft of row tubing and 198 ft with 10% spare. The page does not give a tubing total for that imperial example, so the 198 ft figure is a table figure, not a page figure. If your rows are in feet, keep the header in feet.
The 60 m maximum run for 16 mm tubing
A drip line cannot run without limit. The planner page says a drip line run is typically up to 60 m, which is 200 ft, for 16 mm tubing, which is 1/2 in tubing, and less with high flow emitters. That limit is a run limit, not a total tubing limit. It applies to one continuous run. A garden can use far more than 60 m in total, because each row is a separate run.
| Tubing size | Maximum run | Note |
|---|---|---|
| 16 mm (1/2 in) | 60 m (200 ft) | Shorter with high flow emitters |
Check each row against that limit. A 10 m row and a 20 m row are well inside it. A 60 m row is at the limit. The page does not give a shorter limit figure for high flow emitters, so this post does not give one. If your emitters are high flow, treat 60 m as an upper bound and keep runs shorter.
Inline drip line versus separate emitters
Tubing choice depends on whether the emitters are built into the line or added separately. Inline drip line has emitters built in. The planner page says to skip the separate emitter count if you use it. You still need the same length of tubing, but you do not count emitters one by one for that line.
Separate emitters are used with plain tubing. The tubing length still follows the same formula. The emitter count is a separate step. Whether the emitters are built in or added later, the length of line along each row is the same. Inline line is bought with emitters already in it. Plain tubing is bought as tubing, and emitters are added as a separate part.
What the header is and how to measure it
The header is the line that feeds the drip lines. It runs across the ends of the rows, and each drip line joins to it. In the formula, the header is added once, after the row tubing. It is not multiplied by the number of rows or lines per row.
Measure the header where it will run. Start at the water source or the filter and pressure regulator assembly, and measure along the path the header will take to the farthest row it feeds. Include bends in the path.
The planner page does not state a header length, and this post does not invent one. Measure it in the garden, in the same unit as the rows, and add it to the row tubing total.
How much spare to allow and how to buy it
Allow 10% spare on row tubing in the tables. It covers cuts, joins and small measuring differences. It does not cover a forgotten header or a forgotten row.
Apply spare to the row tubing total, then add the header. That is the order used in the tables. For six 10 m rows with one line each, row tubing is 60 m, spare is 6 m, and the table total with spare is 66 m. Then add the measured header. Buy in whole buyable numbers. Tubing bought by the metre is bought in whole metres, so round the total up to the next whole metre. Tubing bought in coils is bought in whole coils. Never present a fractional coil as buyable. This post gives no coil length, because coil lengths vary.
Common mistakes
- Forgetting the header, and buying row tubing only.
- Multiplying the header by the number of rows, instead of adding it once.
- Counting one line per row when the plan uses two lines per row.
- Mixing metres and feet in one sum.
- Using the 60 m run limit as a total tubing limit.
- Inventing a header length to make the 66 m example split exactly.
- Buying a fractional coil, or buying the exact table total with no rounding up.
- Giving fitting counts by brand, when fittings vary by brand and layout.
How to check your total before you buy
Check the total in three steps. First, check the rows. Count the rows again, check the lines per row, and measure one row with a tape. Multiply rows times lines times row length. Second, check the header. Measure the header path in the garden, in the same unit, and add it.
Compare the result with the table row that matches your layout. For six 10 m rows with one line each, the table gives 60 m of row tubing and 66 m in the table with 10% spare. A result of 120 m means two lines were counted instead of one.
Use the drip irrigation planner for the final check. Enter the same rows, lines and row length, and compare the planner tubing total with your hand total. If they differ, check the header length and the spare.
Frequently Asked Questions
Q: How much drip tubing do I need for six 10 m rows?
A: Row tubing is 6 times 1 times 10, which is 60 m. The planner page gives about 66 m of tubing plus 10% spare for that layout. Add your header length to the 60 m row tubing total.
Q: Does the drip tubing length total include the header?
A: No, not in the tables in this post. The formula is rows times lines times row length plus header, so the header is added after the row tubing. Measure the header and add it to the table total.
Q: How much spare should I allow on drip tubing?
A: Allow 10% spare on row tubing in the tables. In the table, 60 m of row tubing plus 6 m spare gives 66 m. Round the final total up when you buy.
Q: What is the longest drip line run?
A: Typically up to 60 m, which is 200 ft, for 16 mm tubing, which is 1/2 in tubing. The limit is less with high flow emitters. The limit applies to one continuous run, not to the total tubing in the whole garden.
Q: Should I use inline drip line or separate emitters?
A: Inline drip line has emitters built in, so skip the separate emitter count if you use it. With separate emitters, use plain tubing and count emitters as a separate step. Tubing length follows the same formula in both cases.
Q: How do I buy drip tubing without buying a fractional coil?
A: Round the total up to whole buyable numbers. If tubing is sold by the metre, round up to whole metres. If tubing is sold in coils, round up to whole coils. Never present a fractional coil as buyable.
More guides

How to Choose a Fertilizer Rate: Meet Nitrogen or Cap Every Nutrient
Learning how to choose a fertilizer rate starts with one choice. You either meet a chosen nutrient target, usually nitrogen, and accept…
Read guide
Too Much Phosphorus From Fertilizer: Surplus, Signs and Fixes
Too much phosphorus from fertilizer is a surplus that appears when a balanced blend meets nitrogen and supplies twice the phosphate the…
Read guide
Fertilizer NPK Numbers Explained: What N, P2O5 and K2O Mean
Fertilizer npk numbers are the three percentages on a fertilizer bag, listed in the order nitrogen, phosphate and potash. They tell you…
Read guide